

The Monthly Wort will provide readers with detailed descriptions of specifically chosen herbs (aka “wort”, meaning a useful herb), splitting it into 4 categories over the span of the month. Herbal History, Medicinal Uses, Magical Uses and Growing/Harvesting. In order to get the full scope of each plant, stay tuned every week as we delve into spiritual and practical experience of Herbalism.

The great thing about yarrow is how hardy it is. As a gardener, as a wild harvester or as someone wanting to simply purchase it from a nursery, the ease at which you can cultivate this plant is amazing. I have pulled a plant from its natural environment and replanted it in my garden, and I have also grown it from seeds. Which is why it is one of the most popular garden plants around! It has been used to line walkways, add altitude to short crops and bring butterflies in.
- Yarrow is outstandingly easy to grow! -
I have found the wild plants to be vastly more enduring and drought tolerant, which is a predictable result based on the fact that the wild plants have had generations to adapt to harsh weather. Yet, overall, this is the kind of herb that you won’t have to babysit in your garden. It grows well in USDA Hardiness zones 3 – 9, but I have seen it growing naturally or by gardeners in more.

Yarrow Seeds
Growing Yarrow From Seeds:
The tiny seeds of this plant require surface sowing to avoid rot. Collect seeds on a finger and gently press them into the sowing soil or Jiffy Pellets. Bottom watering is the best option for tiny seeds like these to avoid accidentally washing them away, so long as you pour out the excess water after they are sufficiently wet.
The seeds should germinate in 5-10 days and prefer temperatures between 65-75.There is not need to cover the seeds – humidity can often cause more damage than good. Keep under grow lights or in semi-direct sunlight until they grow their True Leaves (the second pair of leaves that resemble what the adult leaves look like), after which you can plant them in full sun and in a light soil. It does not need heavy, rich soil as that can cause floppy stems and limp leaves. The same leggy leaves results from lack of sun, so be sure to give your yarrow all the exposure it needs!
The first year will produce only the rosette, a cluster of leaves, before it will sprout long stems up that will form flat clusters of flowers (umbels) on top.
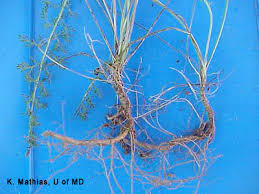
Yarrow Roots
- Watch your yarrow grow like a weed! -
Once the yarrow plant becomes established, the rhizomes beneath the surface with start to spread. They can move pretty quickly and form almost separate plants a few feet away from the original host. The traveling these roots do is one of the reasons yarrow can be considered somewhat of a pest, as it rarely occupies one space alone. Thankfully, if you carefully dig up these offshoots, you can propagate them by “division” and plant them elsewhere more purposeful. This is best done in their 3rd or 4th year.
Harvesting and Drying Yarrow
Almost the entire plant can be harvested, more particularly the aerial parts. You will want to harvest them after the flowers have fully bloomed and are still vibrant looking. Using sharp, curved pruners or a ceramic knife, you can cut the stocks off quite long. Cut the leaves at their base, where there are less or no feathers. It is best to do this on a cool day that hasn’t had any dew or rain production to best retain all those lovely essential oils in the plant.

If you don’t have a dehydrator, you can bind the stems of the yarrow in small bunches and hang them to dry. I usually dangle mine from a wire hanger and then put a brown paper bag over them to keep the light out and absorb most the moisture to avoid rotting. I keep them out of the sun in my closet or pantry over a tray to catch any falling particles. They will usually dry in a few weeks. Touching them and testing for brittleness is the best way to tell. They should be crisp (so that the stem snaps in half cleanly) but not brown. Check often for signs of mold or pantry moths.
If you DO have a dehydrator, garble the stems (strip them of their leaves and flowers) using your fingers or pruning shears and arrange on a drying tray. You will want to put the dehydrator on the lowest setting (95* should do) until they are snap-dry. You can use the stems for powders as well, don’t waste them! Simply cut them into shorter sections and dry until they are crisp. You can pound them in a mortar to start and then chop them in a coffee grinder to take them the rest of the way.
Store flowers in an airtight container out of direct sunlight. They should last about six months to a year that way. The powdered stems last less, about 6 months.
And that’s it for yarrow. Thanks for joining me in The Monthly Wort! See you next month with the next showcased herb!

